
Blog
Our Blog
Planning a Bathroom Renovation: What You Need to Know
Planning a Bathroom: What You Need to Know
In every home, after the kitchen, the bathroom is one of the essential rooms in the house. The kind of value you get from the kitchen, you will get as much in your bathroom, and as we try to make the most of the precious downtime, the status has been raised, and only practical needs no longer drive it. Many people are renovating their bathrooms with a lot of pampering and relaxation in mind.
For whatever reason, installing a new bathroom is a daunting task and can be deceptively tricky.
It requires technical skill and an array of fittings. For this reason, you have to be careful when planning from the start to prevent costly mistakes and changes later on.
Don’t be too stressed by your new bathroom project. Get every aspect of your bathroom scheme right the first time with the brilliant bathroom ideas herein.

1. Evaluate all your bathroom needs
Figure out your priorities first. A spa-style sanctuary or a family bathroom will require a long list of various specifications and fittings such as double basins, heaps of storage, a bath and a separate shower. However, an en-suite or guest bathroom may not require much. Usually, guest bathrooms only need showers and loo.
2. Plan your bathroom layout and Consider storage space
Please be careful with your bathroom layout. Please don’t change it for the sake of it. If it serves you well, then you should keep it. It is a much cheaper option to modify the existing layout than creating a new design. Also moving waste and water pipes can be expensive.
However replacing fittings, flooring and tiles or walls is the best way to get a complete refresh. If you wish to alter your layout, think of ways to make small but significant changes. You can gain more space by fitting sliding or rehanging doors. A substantial space for extra towels is a smart buy
3. Seek out some inspiration
Things have changed a lot in bathroom designs, and you don’t have to worry about where to get good designs to pick, stick to your taste, but you can seek inspiration from hotels and small boutiques which are a great source of design inspiration. You can also look for websites to get the looks you love.
4. You need to be realistic about your bathroom space remember, ventilation is important
There is no point to create sinks for everyone in your house; this is not going to fit in most of the Australian bathrooms. Keep things simple, and don’t overlook the ventilation. Ventilation is so essential in any bathroom with furniture because condensation can damage the wood.
Conclusion
Planning bathroom renovations Townsville is not a very simple task, but you can manoeuvre your way by following the guide above. Remember to consider the cost of your plan and try to keep things simple. Try to Invest in one beautiful piece, such as a freestanding bath and show it against a more budget-conscious backdrop. You might need a bigger water tank if you wish to have a rainfall shower. A water softener can be a smart idea to prevent the build-up of any limescale.
How Often Should You Restore My Deck?
How Often Should You Restore My Deck?
Most decks need a tad of cleaning and maintenance at least once every year. A pressure washer is one of the ideal equipments to accelerate the deck restoration process.
If it’s been for a little while since the deck was sealed, and water no longer beads up on the surface, it might likewise be an ideal opportunity to reapply deck sealer.

Regardless of whether your deck simply needs a quick cleaning or a total invigorate, you will get detailed information in this article on the process and benefits of deck restoration.
The Process of Restoring Your Deck
Here are the steps to restoring your deck either by yourself or ask your deck builder.
Scratch off Loose Finish
Eliminate free paint or dark deck stain with a paint scrubber. Scratch down harmed zones to uncovered wood. Sand every region to plume the edges of residual completion material down to uncovered wood.
Scrub the Surface
Utilize a stiff bristle brush to eliminate chipping stain or dirt. Try not to utilize a metal bristle brush on cedar or redwood because metal bristles may scar the delicate wood.
Apply Cleaner
Apply a deck brightener/refinisher item to wood surfaces. Blend the item as indicated by producer’s directions. Work the brightener into the wood with a firm bristle brush, utilizing an extension handle on the brush, if important.
Power Wash Deck
Wash the deck surfaces to eliminate brightener arrangement and other buildup, utilizing a power washer with a fan shower spout. Utilize the low force setting to abstain from harming the wood. Let the deck dry completely prior to applying new finish.
Apply Finish
Apply finish material with a sprayer. Utilize a hand-siphoned unit for little deck regions, applying finish on little decks with a roller and brush. Utilize a roller on decking after splashing to compel finish into the wood and to spread out any pooled fluid.
Utilize a Brush
Utilize a brush to work the completion into the end grain, creases and holes between sheets. This technique is referred to as back-brushing. Ensure you back-brush vertical surfaces to eliminate drips.
Benefits of Deck Restoration
Here are the benefits of deck restoration.
Increased Visual Appeal
The primary thing you will see when you re-stain your wood deck is a redesign in its visual allure.
Add Value to Your Home
A wooden deck that has not been maintained is seen as a budgetary obligation for those hoping to sell as well as buy a home. A wood deck that has been newly restored can be a resource. Actually, a well-maintained deck can recover up to 90 percent of the worth that was initially spent to construct and install it.
Prevent Your Deck from Rotting
If your deck isn’t re-stained consistently, the wood will start to deteriorate. In extreme cases, your deck can even start to spoil away, driving you to go through superfluous measures of cash to have the faltering parts replaced or even have your whole deck remade. To keep this from occurring, we suggest deck once a year. If you are looking for a Nottingham Decking then you can reach out to Nottingham Decking Co for a free quote on your next deck!
How to Choose the Best Roof for Your House
Choosing a new roof for your home is not a straightforward thing. There are many factors you need to consider, as explained in this guide.
Here are the factors to consider in choosing the best roof for your house.
- The price
Installing a new roof is a crucial investment that needs adequate funds. Therefore, the price is an essential consideration when choosing a new roof for your home. It is vital to make wise decisions when selecting your roofing. It is advisable to invest in top-quality and durable roofs because it pays off well in the long.
A high-quality roof is less likely to malfunction or get damaged by adverse weather elements. With such a roof, it is less likely that you will spend a lot of money on future roof restoration.
- Local building codes
Local building codes vary from one state to another; therefore, it is vital to familiarize yourself with them before selecting the roof. The laws are intended to protect your home by ensuring roof installation is done in accordance with the regulations.
- Curb appeal
There are rules on the types, colors, and styles of shingles that are acceptable in some areas. These regulations are meant to maintain the curb appeal of the neighborhood. If there no roofing regulations in your area, ensure that the roof you select is similar to those in the surrounding areas. Choose colors and styles that align with your home and neighborhood.
- Roof slope
Some roofing materials require more or less slope than others, and that is why you will have limited options based on your existing structure. For instance, asphalt shingles require a minimum of the 4-in-12 slope.
- Homestyle and architecture
The roof you choose must match your home’s style and architecture in terms of colors, designs, and shapes. Proper matching of styles and colors help improve the curb appeal and value of your home. If you have limited roofing options, consult your roofing contractor for guidance.
- Roof installation or roof replacement
When choosing a new roof, it is vital to consider its application. For instance, if you are installing a new roof to a new structure, you have several options because the new roof doesn’t depend on any existing materials. However, when replacing a roof, you must consider the existing components and decide the best roofing material for replacement.
Or if you are looking to simply renovate your roof, we recommend Roof Restoration North Shore Sydney.
Benefits of Taking Your Car to a Car Detailing Specialist
As a responsible car owner, you only want nothing but the best for your vehicle. A car is one of the most important things that you should have. It helps you go to destinations to do various of things like buy supplies, do some land travelling for a short vacation, or even in an emergency visit to the hospitable. Because a car is a dead investment, you need to make sure that you make the most out of it. Therefore, what you need to do is to regularly bring your car to a car detailing specialist.
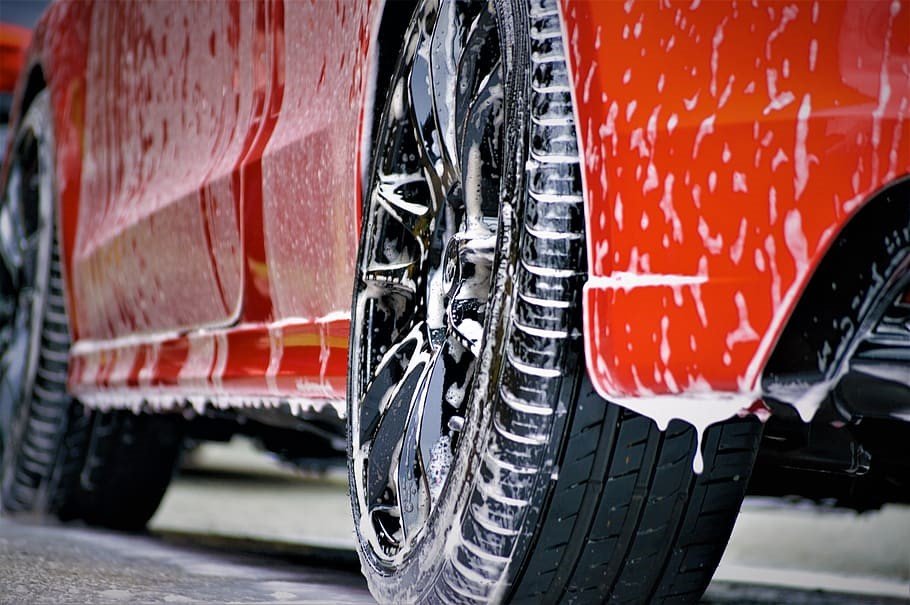
When we say car detailing, it talks about the overall restoration of your vehicle, making it look like it has just been released from the showroom. It’s like car washing, but only more thorough. This is entirely the reason why every once in a while, you need to take your vehicle to a car detailing specialist just like Mobile Detailing Glasgow in order to maintain its glory. If you are not convinced yet, here are some benefits that your vehicle could get that would definitely lead you to a car detailing shop near you:
- Value Restoration
Although you need to cling to your car as long as possible, there will come a time that you will sell your vehicle in order to upgrade to a newer model. What better way to dispose off your old car than selling it for a hefty price, right? Although selling your vehicle is not necessarily a choice for now, you will never know when you will have to sell it. In order to maintain the high price of your vehicle, you need to make sure that you regularly take it to a car detailing specialist so that by the time you are decided to bring your vehicle and sell it, you could still sell it in a good price.
- Specialized Detailing
One of the reasons why it is good for your vehicle to be taken to a car specialist regularly is that these professionals have keen eyes for details. They are not only going to thoroughly clean the surfaces of your vehicle, but they will look into the tiniest dirt in order to wash it off and wipe it squeaky clean. All these things will be done in your vehicle, but only in a short span of time. You don’t want to be commuting for a long time right? Thus, choosing to bring your vehicle to a professional car detailing could be the best decision that you will make for your vehicle.
- Safety
Most importantly, taking your car to a detailing specialist could keep you safe in the long run. Apart from cleaning, these professionals will also check whether there is something wrong in the parts of your vehicle such as the break, the wheels and other parts that would compromise your safety if left unchecked. Thus, if you want to keep safe while riding your car, make sure that you regularly take it to a professional car detailing shop.
How to Maintain Your Electric or Automatic Gate?
An electric or automatic gate offers plenty of benefits and provides a lot of conveniences to both the commercial property owner and homeowner. It doesn’t just appear great when it’s totally installed, but it also helps to increase the privacy and security level to your commercial or residential building that just cannot be attained in other ways. Electric fences are perfect for residential houses that would want to keep unsolicited visitors out, parking lots, and even in storage centers. The greatest means of have your automatic gate properly work and last long is to maintain it. Below are a few ways you can keep up your electric gate after installing it. 
Maintain Electrical Parts
You must never get any problems with your gate’s electrical components for the most part. However, sometimes, you’ll have to clean such important components. This will need attention to detail and delicate hand. It’s essential to refrain from utilizing strong and abrasive cleaners all over the gate’s electronic components since they can possibly wear down electronic parts and moving parts. It would be recommended to utilize clean and dry clothes to get rid of debris and dirt from your automatic gate’s electronic components.
Make sure to properly oil your gate
If you fail to oil your electric gates properly, they could be jammed while you use it and they can also stop working. When the gate’s motor will overheat due to excessive friction during operation, it could be a major issue. Putting some oil to your gate’s moving parts is simple to do and must be done regularly if you don’t want to get issues with the flow and movement of your electric gate. If you’re not confident in doing it yourself or you’re too busy, you can always reach Geelong Fence Specialists.
Regularly clean your gate
No matter what the size your gate is, it’s important to have it cleaned regularly. Never allow debris and dirt to have an opportunity to accumulate on your fence since it can be unsightly. Moreover, it can result in problems with your gate’s functionality. You can opt to clean your gate by yourself, however, you need to guarantee that you clean out the debris and dirt from any mechanical parts and hinges of your gates. This helps to make your gat run smoothly without interruption.
Maintain it regularly to make it long-lasting
Similar to what you buy for your office or home, the better quality your product is, the long-lasting it will be. This does not imply that it will be maintenance-free, in fact, it’s normal to have a few maintenances. But, if you’ve noticed that you’re spending more time to try opening your electrical gate rather than really passing through it, consider that as a telltale that you need to upgrade it. While you guarantee that your automatic gate will be kept clean, the mechanical component properly oiled and the electronic parts intact, you’ll be able to enjoy your automatic gate for several years.
Major Dangers of DIY Roofing Job
Your roof serves an important role. Hence, it’s only reasonable and important to maintain it to be in its greatest condition always. Regular maintenance and inspection will aid in prolong your roof’s lifespan and preserve its quality. Though it might be appealing to attempt and repair the usual roofing issues on your own, it’s vital to leave the job to Dumbarton Roofing contractors. If you push through DIY roof projects, here are the possible risks you might experience:

You could be liable for more expenses
A lot of people think that it’s more inexpensive to do their roofing maintenance and repair themselves. Although employing an expert to complete the job might encompass higher starting expenses, quality work can assist you to prevent frequent repairs and leaks, which will eventually cost you more. Moreover, a healthy roof will aid you to save money through your reduced energy consumption.
Delay of completion
If you go for DIY roofing projects, they might wind up to take much longer because you lack the needed tools, experience, and expertise. Employing a professional and skilled roofing contractor will guarantee that the repairs or installation are effectively done within a short time.
Safety risks
Other roof repair and maintenance jobs usually come with particular safety risks. You won’t just need to haul roofing materials and tools to an elevated position, but it also keeps you from falling or slipping. Without the needed experience, you and the people who live in your house will be exposed to possible dangers. Regardless if you’re home repair should be dealt with or you need to get your broken roof fixed, you need to guarantee that the job will be safely completed.
Improper repairs
If you wish to maintain the quality of your roof and guarantee that it will effectively serve its purpose, you’ll require good repair and maintenance services. Attempting to do roofing repairs on your own might lead to a mishandled fix. Expert roofing contractors have the needed experience and knowledge to successfully do roofing projects and repair. They won’t just do roofing installation that’ll have long-lasting results, but they will support in reducing the dangers of issues such as wear and tear and weather damage.
Hire the best roofing service company in town
The professional roofers would want all the property owners to have their roofs to be checked at least once every year. To delight in the advantages linked with employing an expert roofer, you must think about collaborating with a proven and tested roofing service company in town. Thankfully, Dumbarton Roofing is here to provide you quality services for any of your roofing and maintenance needs.
Dumbarton Roofing is a company that’s been in the industry for several years already. We make sure that our roofing contractors are licensed, insured, and bonded to legally work on your property. They are also trained in the specific services that they are assigned. If you want to try one of our roofing services, contact us now.
Tree Trimming Mistakes You Should Avoid
Trees look great especially if they are regularly trimmed and nurtured with care and love. Thriving and healthy trees don’t just improve a property’s curb appeal, they also boost the life’s quality by offering natural aspects into the premises. Moreover, trees help in terms of making wonderful neighborhoods and streets, encouraging energy conservation, and checking pollution. Because of this, a lot of property owners make sure to spend their time in keeping up their lawns and trees. To guarantee that your trees will keep up a healthy development, their dead branches and leaves must be eliminated at the proper intervals to give in space for new ones. But since a lot of property owners lack the proper knowledge when it comes to tree trimming, they usually make some mistakes that must be prevented, such as the following:

Remember that trimming is not about cutting down random branches. The right way of trimming a tree takes plenty of knowledge and effort before it can be mastered, which a lot of property owners lack. If you trim the wrong branches, it makes the tree’s shape become less appealing and eventually weakens your tree. Hence, you need to be careful about this.
Utilizing unsanitized and dull tools
The hygiene of your equipment and tools you utilize for trimming can greatly affect your tree’s condition. Actually, cutting a tree using dull and ineffective equipment can result in the development of infectious bacteria and fungi. If your tools are contaminated, it can similarly impact the trees as well. Moreover, cutting your trees with a murky tool can result in unwanted wounds and jagged marks, which could be difficult to heal. Hence, you need to only utilize sanitized and well-kept tools or you should employ the tree arborists to properly finish the trimming job.
Over trimming
Each cut made on your tree can compromise the entire protection system of the tree, which makes it exposed to potential insect and fungus infestation. Studies show that not above 25 percent of tree branches must be removed simultaneously since it can boost the risk of infestation. If you excessively eliminate your tree’s canopy, it won’t be able to structurally support itself, transfer nutrients, and produce enough food. Hence, make sure to estimate the right balance to achieve the greatest benefits of tree pruning and trimming.
Cutting trees at the wrong time
Trees should be cut at the right intervals and it’s important to know when the best timing to cut your trees. Generally, homeowners wait for the tree to appear disheveled and a bit overdeveloped. As soon as the trees are all heavy and dense, they think to believe that it’s the right time to get their shears and trim their trees.
But, some factors such as weather and climate changes need to be considered well before starting your tree’s trimming mission. If you cut your tree at the wrong time, it can affect its development. To determine when you should do it, you need to call the Darwin tree loppers right away.
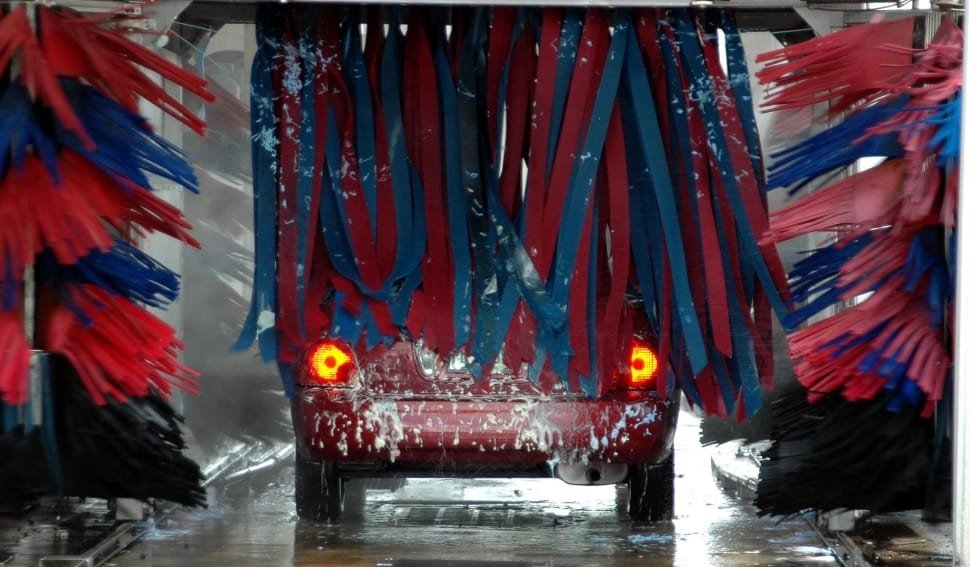
What Are the Disadvantages of an Automated Car Wash?
An automatic car wash has been widely used now since they are time-saving and hassle-free. But, despite their convenience, automatic car washes are actually detrimental to your car than it causes good outcomes. Here are some of the cons of having your car washed automatically.
The technique of drying your car
In several instances, the heated air that’s intended to dry off water is not enough. If you drive off in a vehicle that isn’t totally dry will only produce lingering streaks and spots, which will need intensive cleaning and maintenance sooner or later if you will not clean it up using a spray cleaner.
Fail to remove all dirt
The lack of contact, particularly for automatic touchless vehicle washes hampers their ability to entirely clean your automobile. If you utilize automatic systems in cleaning your car, the trouble spots won’t be determined and dealt with right away. The buildup of dirt just indicates that your automobile would appear dismal as the time passes by.
Harsh cleaning agents
Nearly all businesses have a goal to maximize their income by reducing their operational expenses. The utilization of inexpensive cleaning agents, which has acid as the main ingredient, isn’t totally unheard of particularly in touchless carwashes. Although you get a sparkling clean vehicle after this type of carwash, the acid will slowly deteriorate the protective wax and the paint of your vehicle.
Meanwhile, an automatic carwash that’s not touchless operates rotating brushes to clean your vehicle. This is meant to rub against your vehicle to get rid of the accumulated dirt. Even if the contact isn’t that aggressive, try to observe your car in close distance. You will see that it has swirls and scratches that eventually causes your vehicle to be dull.
Recycled water
An automatic car wash is the most water-economical and eco-friendly way of cleaning your vehicle since it is intended to use recycled water. Even if they have installed many purification systems to eliminate contaminants, they aren’t 100% effective, which end up in dirt and grit scratching your vehicle’s exterior and surface while it’s being washed.
Factors to pay attention for the hand dry option
Though a lot of automatic vehicle washes utilize heated air to dry off the spare water, other carwash providers have staff who perform hand-wipe services as soon as the cleaning is finished. This method is fine given that the towels utilized are clean and soft. However, most car wash facility uses the complete opposite of that—dirty and abrasive towels. Consequently, this will only lead to your vehicle to get more scratches and marred paint.
Keep in mind that a properly kept vehicle that has a prim-looking finish can be equated to higher resale value. Even if automatic car wash services can make your vehicle appear nice in the short term, your car can still become unsightly over time especially if you keep on using this service. Hence, it would be best to contact the best mobile car detailing Darwin and have it cleaned by the automobile technicians and specialists.
 Great Music Products Online
- Planning a Bathroom Renovation: What You Need to Know
- How Often Should You Restore My Deck?
- How to Choose the Best Roof for Your House
- Benefits of Taking Your Car to a Car Detailing Specialist
- How to Maintain Your Electric or Automatic Gate?
- Major Dangers of DIY Roofing Job
- Tree Trimming Mistakes You Should Avoid
- What Are the Disadvantages of an Automated Car Wash?
Recent Comments